It is possible to include multiple languages in a dataset that has been imported to Halo Reports.
Multiple languages can be assigned to question labels and dictionaries (response tables).
Import a data file into Halo Reports using the Data Import feature.
After the import process completes, open the report in the Data Import editor.
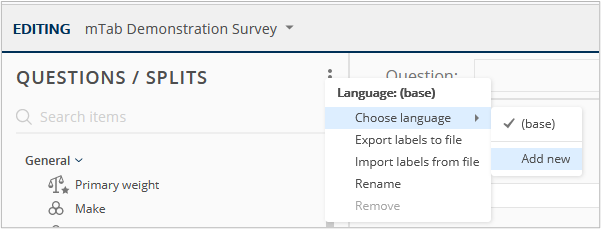
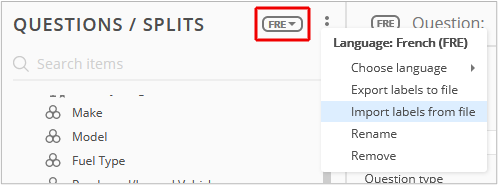
Click the 3-dot menu located to the right of Questions.
The language that the dataset was imported with is referred to as the base language.
To include an additional language, select the Choose Language option, then click Add New.
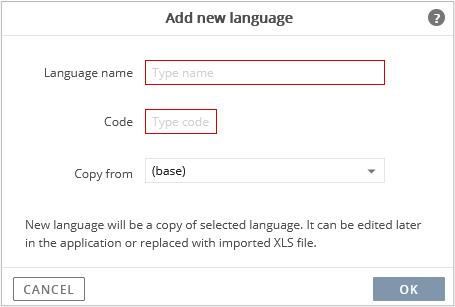
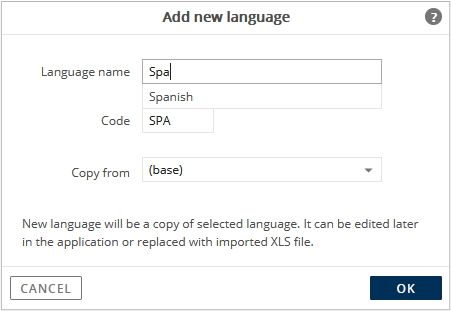
The dialog window to add a new language will appear.
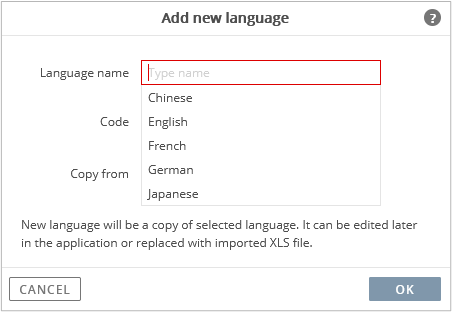
Click the Language Name field to display the default language options.
Note: additional languages are available and supported.
Type the first few letters of the desired language in the Language Name field to select a different language that is not displayed in the default list.
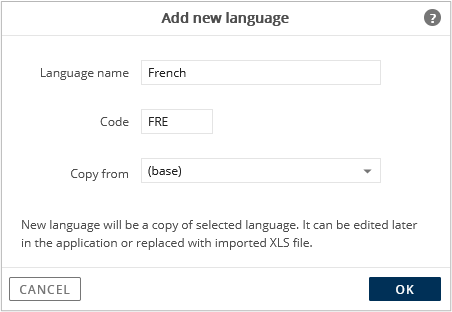
For this example, French will be included, in addition to the Base language (English).
After selecting the desired language, click the OK button,
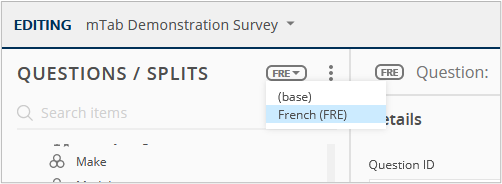
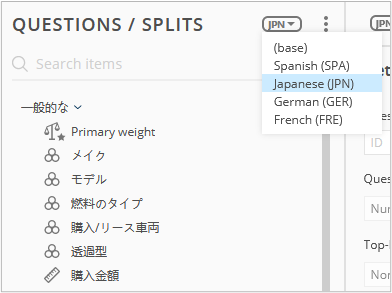
After including an additional language in the dataset, a language drop-down menu will appear to the right of Questions.
French is displayed as an option in addition to the Base language.
When the translation process is completed for the newly added French option, toggling between the language selections in the menu will change the text in the dataset from English (Base) to French.
The next steps require a French translation of the existing text in the dataset.
At this point, the question label text and dictionaries can be manually edited to include French text.
Productivity Tip:
Instead of paying for 3rd party translation services then manually editing the question labels and response text, the language translation functionality from Google Sheets or Microsoft Excel can be used.
Important:
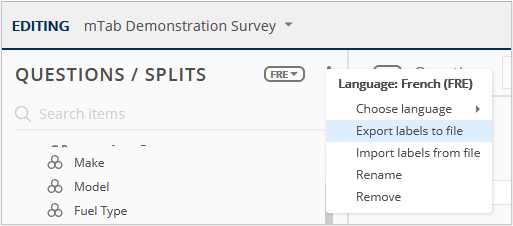
Be sure that the language to translate (FRE for this example) is selected in the menu drop-down before proceeding.
If the Base language is selected, change the menu to show the language to translate.
Click the 3-dot menu and select the Export Labels to File option.
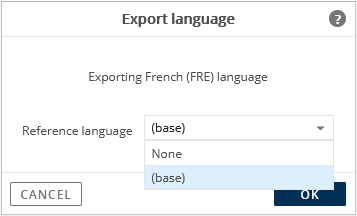
The Export Language window will open and will display the language to export.
Select the Reference Language option to either include the Base language in the exported sheet or None.
Click the OK button to export the spreadsheet.
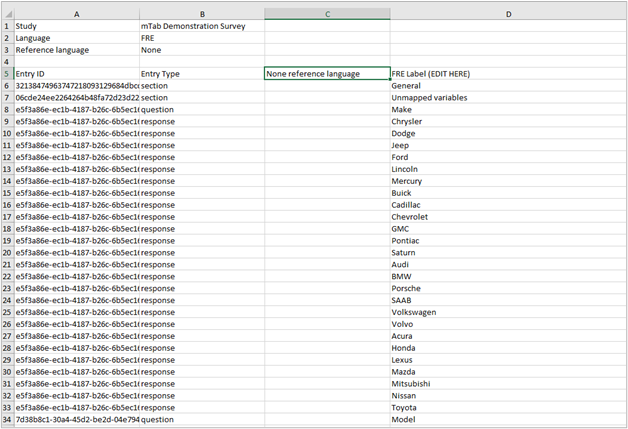
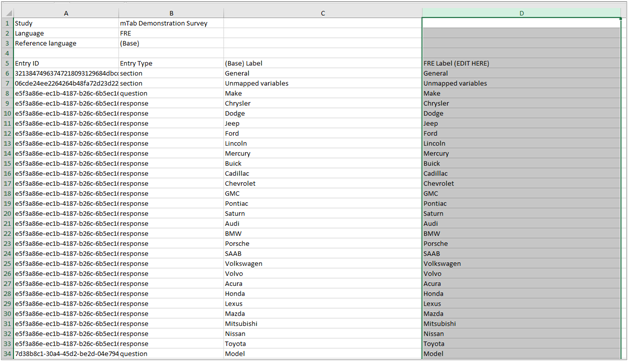
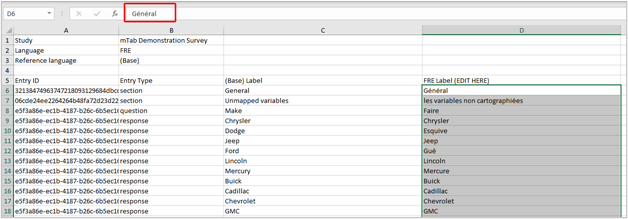
This exported spreadsheet example shows the contents of the sheet with the None option used as the Reference Language selection.
Notice the empty column C.
Column D contains the contents that need to be translated to French.
Currently the text is in English, which is the language that the data was imported with.
This next exported spreadsheet example shows the contents of the sheet with the Base option used as the Reference Language selection.
Notice column C is populated with the contents for the Base language, for reference.
Column D contains the contents that need to be translated to French.
Currently the text is in English, which is the language that the data was imported with.
At this point, the contents of columns C and D are the same.
The following examples will use the exported spreadsheet with the Base option specified as the Reference Language from the previous export step.
Translating the Spreadsheet Contents Using Excel
For this next example, the exported spreadsheet is opened in Excel.
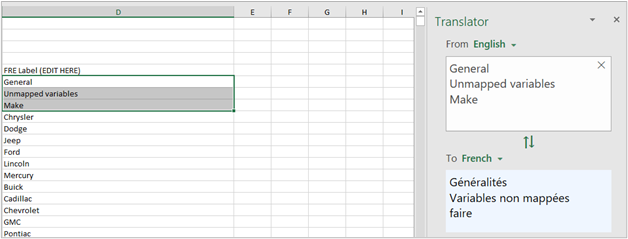
Select a portion of column D to highlight the contents to translate.
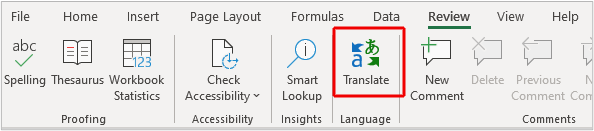
In Excel, go to the Review menu option, then select Translate.
The selected text will appear in the Translator box on the right.
Change the From and To language selections and specify English and French.
The translated text appears in the bottom field (light blue).
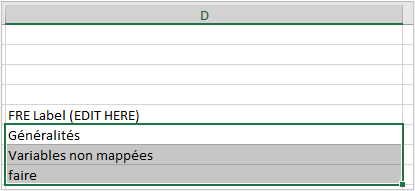
Copy and paste the contents of this field into the spreadsheet.
Tip:
If the translated text is pasted in the spreadsheet going across the cells instead of down the columns, open the Notepad program and paste the text into Notepad first.
After the text is pasted into Notepad, confirm it is oriented in columns. Next, copy and paste the text from Notepad into Excel.
The translated text should appear in the spreadsheet oriented as a column now.
Continue this process of translating the text by using the Translator From and To fields in Excel, until all the required text labels have been translated and pasted into the spreadsheet.
When you are finished, the contents of column D (FRE label) should include the translated text from English to French.
Save the changes to the spreadsheet.
Translating the Spreadsheet Contents Using Google Sheets
Instead of Excel, Google Sheets can be used to translate the contents of the exported sheet.
Open the exported spreadsheet as a Google Sheet.
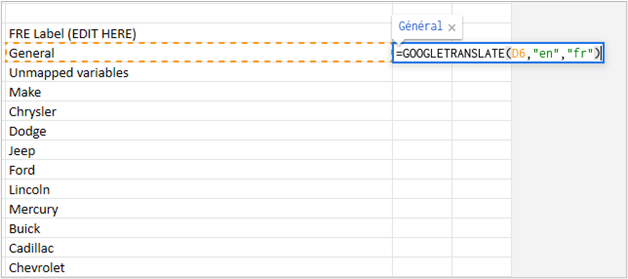
To the right of column D, type the following:
=GOOGLETRANSLATE(D6,“en”,“fr”)
This formula will translate the contents starting at cell D6 from English to French.
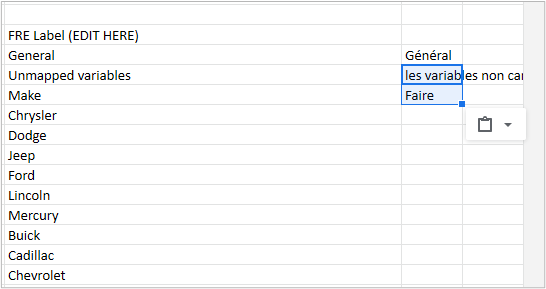
See the results of the translation.
Copy the formula to the end of the column.
Next use the Paste Special function to display the contents in the cells as values instead of formulas.
Confirm the contents of the cells are values not formulas before proceeding.
Export the completed, translated sheet from Google Sheets to an XLSX file.
Return to the Data Import editor.
Confirm that the French (FRE) language option is selected, then click the 3-dot menu and select the Import Labels from File option.
Important!
Do not proceed unless the FRE option is selected.
Importing the translated sheet with another language selected will overwrite the contents in Halo Reports with what is included in the spreadsheet.
Browse in the recently updated XLSX by clicking the Select File button in the Import Language window.
After selecting the XLSX file to import, click the OK button.
A status dialog will appear.
Click the OK button to proceed.
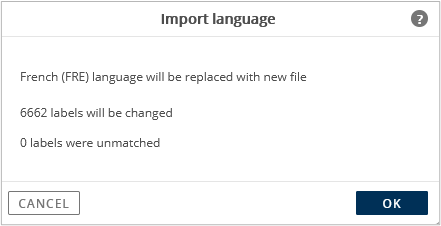
After the language import completes, the confirmation dialog will appear.
Click OK.
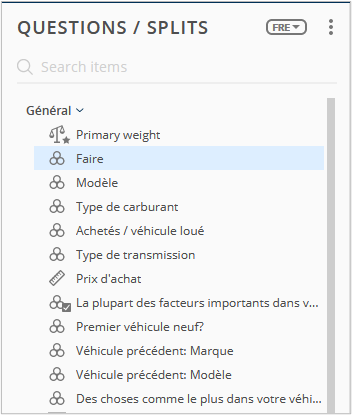
The contents from column D of the imported sheet are shown as the new question label text and dictionary (response table) text.
After confirming the translation updates for the newly added language, click the Save and Exit button to return to Halo Reports.
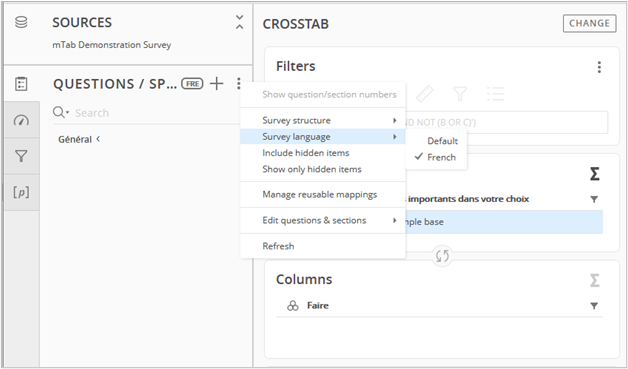
In Query, click the 3-dot menu option next to Questions to select the survey language.
Halo Reports will display the contents of the survey in the selected language.
Selecting Additional Languages
When specifying a new language to add in the Language Name field, the default languages are listed.
However, typing another language in this field will allow you to select another language that is not displayed as one of the default options.
In this example above, typing in “spa” will select the Spanish language option.
Additional languages can be added to the dataset by repeating the previous steps listed above.
Here is an example with a dataset that includes support for five languages, English (base) and the four additional languages that were added using the steps to import another language.
Supported Languages & Codes
|
Language
|
Code
|
|
Albanian
|
ALB
|
|
Arabic
|
ARA
|
|
Azerbaijani
|
AZE
|
|
Belarusian
|
BEL
|
|
Bengali
|
BEN
|
|
Bosnian
|
BOS
|
|
Bulgarian
|
BUL
|
|
Chinese
|
CHI
|
|
Croatian
|
HRV
|
|
Czech
|
CZE
|
|
Danish
|
DAN
|
|
Dutch
|
DUT
|
|
English
|
ENG
|
|
Estonian
|
EST
|
|
Finnish
|
FIN
|
|
French
|
FRE
|
|
Georgian
|
GEO
|
|
German
|
GER
|
|
Greek
|
GRE
|
|
Hebrew
|
HEB
|
|
Hindi
|
HIN
|
|
Hungarian
|
HUN
|
|
Indonesian
|
IND
|
|
Irish
|
GLE
|
|
Icelandic
|
ICE
|
|
Italian
|
ITA
|
|
Japanese
|
JPN
|
|
Korean
|
KOR
|
|
Lithuanian
|
LIT
|
|
Latvian
|
LAV
|
|
Macedonian
|
MAC
|
|
Maltese
|
MLT
|
|
Marathi
|
MAR
|
|
Mongolian
|
MON
|
|
Norwegian
|
NOR
|
|
Polish
|
POL
|
|
Portuguese
|
POR
|
|
Romanian
|
RUM
|
|
Russian
|
RUS
|
|
Serbian
|
SRP
|
|
Slovak
|
SLO
|
|
Slovenian
|
SLV
|
|
Spanish
|
SPA
|
|
Swahili
|
SWA
|
|
Swedish
|
SWE
|
|
Tamil
|
TAM
|
|
Telugu
|
TEL
|
|
Thai
|
THA
|
|
Turkish
|
TUR
|
|
Ukrainian
|
UKR
|
|
Vietnamese
|
VIE
|