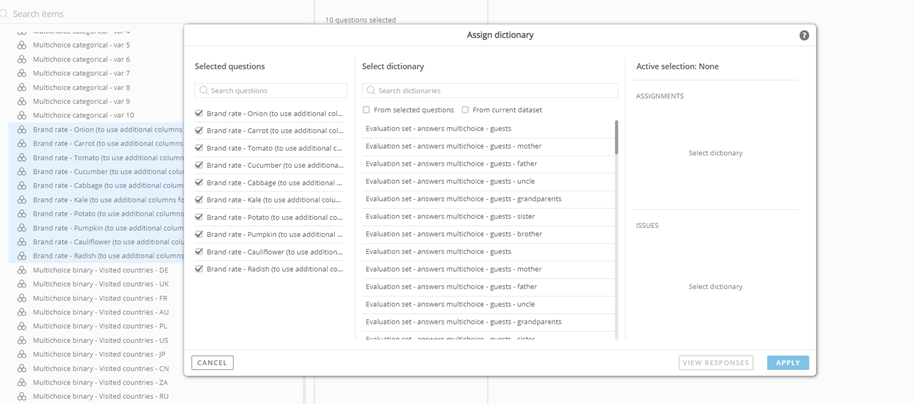
As soon as you click on the "Assign dictionary" command, a new window will appear. In the middle of this window, you will find a list of all the dictionaries available in the given study family.
To assign a dictionary to specific questions, follow these steps:
1. See the list of all available dictionaries in the middle section of the window;
2. Choose the required dictionary by clicking on it;
3. On the left side of the window, you will see the questions that can be assigned the selected dictionary.
Additionally, you can filter the list of dictionaries used in selected questions only or from the active dataset.
By following these instructions, you will be able to assign a dictionary to the questions of your choice.
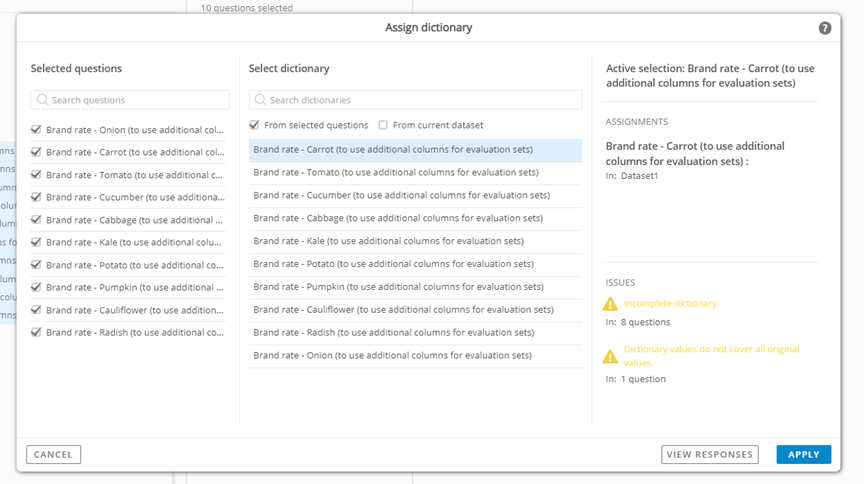
As an example, on the screenshot below it is shown that the list of dictionaries is filtered to the ones used currently in the selected questions. First dictionary called “Brand rate – Carrot…” is selected and this dictionary will be assigned to all the selected questions after clicking “Apply” in the bottom right corner.
If unsure which dictionary can or should be assigned to the given question(s) user can click “View responses” at the bottom of the window to see how the selected dictionary looks like. Right part of the window shows where the selected dictionary is currently used and what potential issues can be caused by assigning dictionary to selected questions.
After clicking “Apply” the window will close and you will get back to the main Data Import window. At this point, it possible to see that the given dictionary is now assigned to all questions it was supposed to be assigned to. The dictionary is now shared by those 10 questions. It means that when changing the dictionary in any way (e.g., label for code 1) then such a change will be then automatically visible for all other questions where this dictionary is used.